Video How to structure your content with Categories and Tags
Categories are mandatory, Tags are optional. Check some best practices on this post.
You can organize your content using Categories (visible to your readers, providing a way to navigate through your content) or Tags (internal organization since it’s not visible to readers). Check our best practices for structuring content below.
Categories
Categories are used to define sections of your site and group related posts. We recommend you to keep up to 6 or 7 categories, so readers can easily understand what kind of content to expect from each Category. You cannot assign categories to pages, only posts.
Categories are mandatory. By default, if you don’t assign any category to your post, Indie Website will automatically categorize it as Uncategorized.
To manage your categories, go to Posts > Categories in the dashboard menu. On the right, you will see a list of all your current categories including their Name, Description, Slug, and Count (total number of posts assigned to that category). On the left, you will see a series of fields that allow you to add a new category.
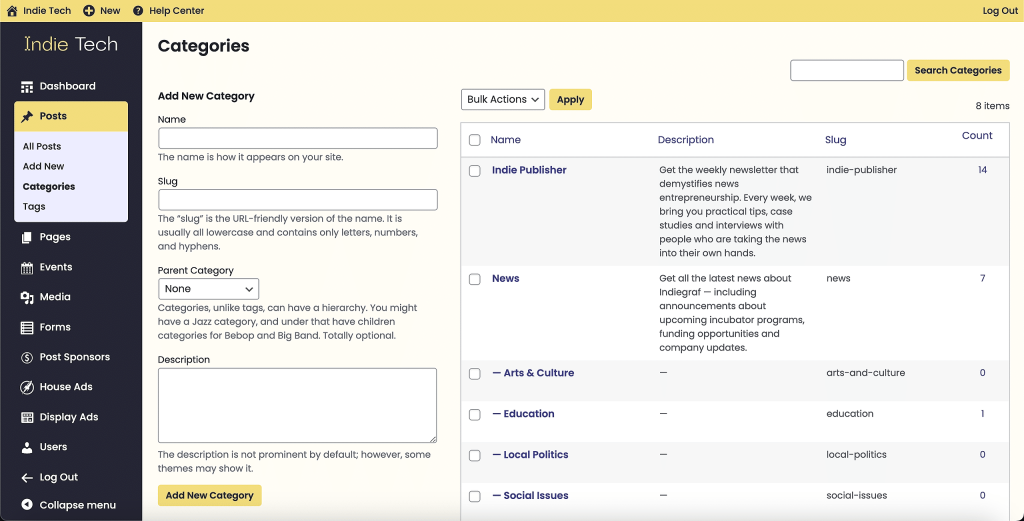
To add a new category:
- In the Add New Category section, fill in these fields:
- Name: (required) The category name;
- Slug: (required) The URL-friendly version of the name (all lowercase and containing only letters, numbers, and hyphens);
- Parent Category: If you would like this new category to be a subcategory of a larger category, select a parent category from the dropdown menu;
- Description: A description of the category. This may appear in various different places on your website, depending on the design;
- Click Add New Category.
To add a category to a post:
• When using the block editor to edit a post, click Categories in the Post tab of the settings sidebar on the right side of the screen;
• To add an existing category, click the checkbox next to that category’s name. Posts can have multiple categories, so you can select as many as you like;
• To quickly add a new category, click Add New Category and provide the New Category Name (required) and Parent Category (optional) when prompted. You should plan to fully configure this new category afterwards via the categories list page;
• Click Publish in the top menu bar to save your changes.

Tags
Tags are keywords that identify important information in your post, such as names and subjects (“politics”, “Justin Trudeau”, “civil rights”, etc.) that may or may not recur in other posts. Unlike categories, tags are not hierarchical – so there are no parent or child tags. You cannot assign tags to pages, only posts. Tags are not mandatory
To manage your tags, go to Posts > Tags in the dashboard menu. On the right, you will see a list of all your current tags including their Name, Description, Slug, and Count (total number of posts assigned to that category). On the left, you will see a series of fields that allow you to add a new tag.
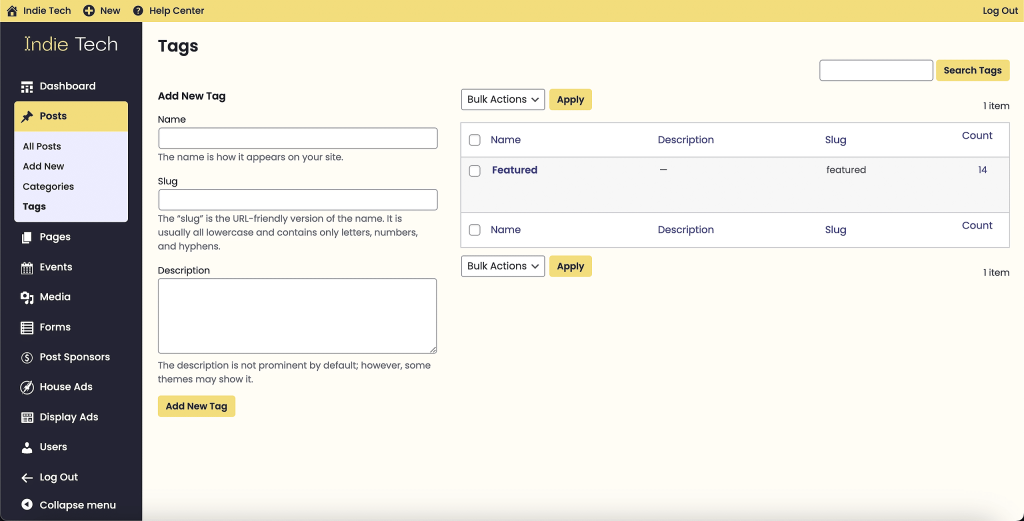
To add a new tag:
- In the Add New Tag section, fill in these fields:
- Name: (required) The tag name;
- Slug: (required) The URL-friendly version of the name (all lowercase and containing only letters, numbers, and hyphens);
- Description: A description of the tag. This may appear in various different places on your website, depending on the design;
- Click Add New Tag.
Adding tags to a post
Keep in mind that adding lots of tags is harmful for your Google Search rankings. For more info, check our SEO guide.
To add tags to a post:
- When using the block editor to edit a post, click Tags in the Post tab of the settings sidebar on the right side of the screen;
- In the Add New Tag field, simply type in your tags. You can separate the tags with commas or simply press the Enter key on your keyboard after typing each tag. Suggestions for existing tags will appear in a menu below the field as you type and you can click on one to select it. Any tags you type in that don’t already exist will be automatically created for you. If you make a mistake while typing, you can click the x icon next to a tag name to remove it;
- Click Publish in the top menu bar to save your changes.

Related Articles

Create your first post with Indie Website
A quick tutorial on how to publish your first post.

Immersive post template
One last tutorial for you!